How To Resize An Image In Photoshop

Resizing images is a common task in Photoshop, whether it be to change the size of an image for printing, posting online, or to fit into a specific design. In this article, we’ll walk you through the steps of how to resize an image in Photoshop.
1. Open your image in Photoshop: To start, open the image you want to resize in Photoshop. You can do this by clicking on “File” in the menu bar and then selecting “Open.” Select the image you want to resize and click “Open.”
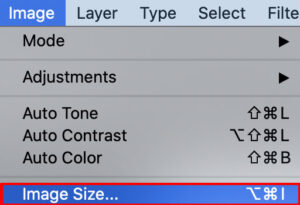
2. Go to “Image” in the menu bar: Once your image is open, click on “Image” in the menu bar. This will reveal a drop-down menu with a number of options, including “Image Size..

3. Select “Image Size”: Click on “Image Size” to open the Image Size dialog box. This dialog box displays information about the current size of your image, including its width, height, and resolution.
4. Change the size of your image: To resize your image, you can either change the width and height values in the dialog box or adjust the resolution. If you want to change the size of the image in inches, cm, or pixels, you can enter a new value for either the width or the height. If you want to change the resolution, you can enter a new value in the resolution field

5. Apply changes: Once you have made your changes, click on “OK” to apply them to your image. You will see the new size of your image reflected in the document window.
6. Save your resized image: Finally, save your resized image by clicking on “File” in the menu bar and then selecting “Save As.” Choose a format and location for your resized image, and then click “Save.”
In conclusion, resizing an image in Photoshop is a simple process that can be done in just a few steps. By following the steps outlined above, you can easily change the size of your images to fit your specific needs.
For more tips and tricks, be sure to check out my Youtube channel here.
